WE WELCOME OUR NEW SITE SPONSOR CAPITAL ONE!
![]() CLICK HERE TO DONATE TO HELP FUND THIS SITE!
CLICK HERE TO DONATE TO HELP FUND THIS SITE!
NEW CLICK HERE TO SEND US A GIFT! A COOL IDEA TO HELP US FOR HELPING YOU!
NEW CLICK HERE FOR THE AMAZON PRIME PAGES!
NEW CLICK HERE FOR HOLIDAY CARDS AND WRAPPING PAGES
NEW CLICK HERE FOR THE UPS PAGES
NEW CLICK HERE FOR THE 2000 4.1 TOYOTA RAV4 PAGES
NEW CLICK HERE FOR HOME AUTOMATION PAGES ALEXA AND FIRE TV AND GOOGLE HOME ITEMS
NEW CLICK HERE FOR Y 3 K PAGES
NEW CLICK HERE FOR THE HOUR METER PAGE
CLICK HERE FOR THE FITTINGS ID PAGES FOR HOSES AND PORTS
NEW CLICK HERE FOR HYD ORINGS PAGES
CLICK HERE FOR THE BIG SHOP TOOLS PAGES
CLICK HERE FOR THE LISLE TOOLS PAGE
CLICK HERE FOR THE THREAD SIZE PAGE
CLICK HERE FOR THE BOLT TORQUE PAGE
CLICK HERE FOR CONSTRUCTION PAGES
CLICK HERE FOR THE WIND POWER PAGES
CLICK HERE FOR HEALTH CARE PAGES
CLICK HERE FOR TV ANTENNA AND ROTOR PAGES
CLICK HERE FOR THE ELECTRONICS PAGES
CLICK HERE FOR THE SAFETY PAGES
NEW CLICK HERE FOR LOCKS PAGES
CLICK HERE FOR IPAD IPHONE PAGES
CLICK HERE FOR THE TRACK AND TELL PAGES
CLICK HERE FOR WORK CLOTHING PAGES
CLICK HERE FOR THE LITHIUM RECHARGEABLE BATTERY PAGES
CLICK HERE FOR THE EMERGENCY LIGHTS PAGES
CLICK HERE FOR THE BELT ALIGNMENT PAGES
CLICK HERE FOR THE HVAC AIR CONDITIONER PAGES
NEW CLICK HERE FOR THE HOT WATER HEATER PAGES WITH RECIRCULATION PUMPS
CLICK HERE FOR THE WINDOW TINT PAGE WITH BLACK OUT TINT TOO!
CLICK HERE FOR THE CAMPER TRAILER LIGHTS WIRING DIAGRAM PAGE
CLICK HERE FOR THE TRAILER TOW PAGES
NEW CLICK HERE FOR THE DIESEL REPAIR PAGES
IECO 210 HP 4 CYL / POUSTUSA CHEVY VEGA PAGE
RADIO SERVICE RADIO CONVERSION AND MORE
SALVAGE YARD LINKS STATE BY STATE LISTINGS
CLICK HERE FOR EQUIPMENT AND SMALL ENGINE PAGES WITH LINKS HONDA PAGES TOO AND HOW TO!!
CLICK HERE FOR THE MOUSE TRAP PAGES A TRAP THAT WORKS FOR US!!
CLICK BELOW FOR THE COOL UNIT CONVERTER SITE
CLICK HERE FOR SHOP TOOLS AND EQUIPMENT PAGES
CLICK HERE FOR MUST HAVE TOOLS LIST PAGE
CLICK HERE FOR AIRCON SOFT START PAGES
CLICK HERE FOR THE INVERTER WINDOW AC UNITS
CLICK HERE FOR THE ELECTRICAL TOOLS AND PARTS PAGES AND MORE!
NEW CLICK HERE FOR RESTAURANT PAGES
NEW CLICK HERE FOR TRUCK CRAIN BED LIFTS
NEW AUXITO ULTRA BRIGHT LED LIGHTS
NEW SEAT BELTS FOR YOUR HOTROD AND MORE
CLICK HERE FOR THE POWER WASHER PAGES
CLICK HERE FOR THE DRAINZIT OIL DRAIN PAGES
CLICK HERE FOR THE DC FUSE PAGE ATO, ATC, MAXI, GMA
NEW CLICK HERE FOR THE SURVIVAL PAGES
NEW CLICK HERE FOR THE WIFI PAGES
NEW CLICK HERE FOR THE TOYOTA RAV4 PAGES
WEBER CARB TUNING PAGE. AND 2300CC / 140 CI IECO VEGA JETTING.
NEW READ THIS FIRST ON CFM AND THE IECO 140 2300 VEGA.
WEBER DCOE SETUP FOR IECO VEGA JETTING
TUNING WEBER CARB'S A FEW TIPS
NEW NICE PDF OF THE WEBER DCOE CARB
NEW FLANGE AND DCOE WEBER CARB DIMENSIONS
Adjusting
and Tuning Downdraft and Side draft Weber Carbs.
An Overview and Short Course: (This is currently
a work in progress...I wanted to post what I had done so far.. It will continue
to grow as more time allows...Bookmark it and come back often and pass it
along...)
Okay....This is going to be the Short Course in what you need to know to Tune and Jet your Weber Carbs successfully...This also applies to Mikuni, Solex, Etc....This is not specific info about specific cars or giving you magic jetting numbers. This is the process we use to tune a car when it is in our shop. I have over 25 years experience tuning these carbs and there is no magic to it. It is just a step by step process that once you get the hang of it you will be able to make your carbs work right every time. It involves more than just Jetting the carbs and in fact that step is the easiest....Following these steps and rules will also make it much easier when you are purchasing jets for your carb...This applies to a single 2 Barrel Downdraft 32/36 Carb or a set of Triple DCOE carbs or even a set of 4 Downdrafts on a V8 engine....The 2 books listed at the bottom of this page are invaluable tools for learning all the basics of your carbs and the various metered tuning pieces that are used in them. It is well worth the small investment in money and time to buy and read these books to help you better understand the carbs you spent all that money on.
I am not going to explain everything about these carbs. The Weber Factory Tuning manual has all the good technical information already written. This is the backyard mechanics guide to the basics you need to know to make your carbs run right....
Step-1: If you are having a problem with how the engine
runs...Poor idle quality, stalling, etc then this is the first thing to do.
CHECK FOR VACUUM LEAKS ! This is particularly true of new installations where
you just purchased and installed a conversion kit and you are having problems.
You have to remember that most Weber conversion have been around for many years
and have been installed on hundreds of cars and trucks. They work. The likely
hood of having a defective carb out of the box is about like being hit by
lightning. If you are having a problem on a new install it is most likely this
problem or one of the steps below... See the Vacuum leak tech page below for
this info. DO NOT OVERLOOK this as a problem...This is the #1 problem with any
Weber carb conversion.
* Do a compression test.. If the compression is off by more than 10% per hole
you will have a really bad time tuning the carbs.
* Always start with a fresh set of Spark Plugs. So not clean them...Start fresh.
This will give you a good reading of fuel mixture and enable you to make a good
judgment of what you need to do.
* Set the Timing...Generally speaking you need a little more advance with a
Weber than with the stock carb. A good place to start for most cars with Webers
on pump gas is 12-14 Degrees advance at 1000 RPM idle and 36 Degrees total
advance by 3000 RPM...This is not cast in stone and you need to make sure your
car does not Detonate at these setting. If you get any detonation then you need
to back off the timing...
Vacuum Leak Tech Page
All About Vacuum Leaks…Carb
and F.I. Systems…..
Okay…This is the biggest problem we encounter
with Carb installations and Fuel Injection systems….The big Questions….
What is a Vacuum Leak ?
A vacuum leak is any leak caused
when sucking in Air either after the throttle plate of a carburetor or after the
Air Metering device on a Fuel Injected car caused by a bad gasket, torn boot,
improperly installed adapter plate or manifold gasket, etc….It is called a
vacuum leak because the area below a throttle plate or metering device (Mass Air
Sensor, Air Flow Meter, Etc.) is under vacuum when the car is at idle and part
throttle….When there is a leak in this area you are not “Leaking Vacuum” but
rather are sucking in un-metered air…The term Vacuum leak has just been used for
so long it is an accepted term
What problems does it cause ?
The major symptom of a vacuum leak
is very poor idle quality, stalling, Spitting back through the Intake, and a
very lean condition at part throttle….This is the most common problem when doing
carb conversions where either adapter plates are used or new intake manifolds
are fitted….On a Fuel Injected car with a Mass Air Sensor or Air Flow Meter this
is allowing Un-Metered air into the engine.. This is a huge problem as the
computer is basing the fuel mixture on the amount of incoming air through the
flow meter and the extra air sneaking in through the leak can cause a dangerous
lean condition.. This is especially true of Turbo cars like the Starion-Conquest
where the Rubber Boot between the turbo and MAF can be cracked underneath where
it is hard to see…
How Do I Find if I have one ?
The best method is to go to the
Auto Parts store and get a can of Starting Fluid..This is basically Ether..This
is a very volatile substance that is easily sucked into a leak and causes a
dramatic change in engine running condition…
With the car at idle spray
carefully around the base of the carb or throttle body, at the area where the
manifold meets the head, around vacuum hoses and any connections either below
the carb base or after the Mass Air or Air Flow Meters…Any noticeable change in
idle speed or quality will indicate a vacuum leak
How Do I get rid of it when I find it ?
That is the easy part….Just
replace the gasket, hose, boot, or clamp that is causing the offending condition
and all will be well again….
Tips for not getting vacuum leaks….
This is easy…When doing a carb or
manifold installation just make sure that you have the mounting surfaces VERY
CLEAN and make sure you put fresh gaskets on all surfaces. Make sure the
hardware is all in good condition and that you tighten the Manifold or Adapter
properly.. That means that you tighten it evenly and a little bit at a time to
insure a proper even crush on the gaskets. If you are using an adapter plate you
MUST use Red Loctite to secure the hardware holding the adapter plate to the
Inlet manifold and plate to plate in those applications. Also use Blue Loctite
to secure the carb mounting nuts…This will insure it does not Vibrate loose
causing a leak…DO NOT USE SILICONE SEALER on intake manifold gaskets or adapter
plates…The Only sealer we recommend for these Surfaces is Gaskacinch which you
can buy from any auto parts store…
Check all Vacuum hose connections
and hose to make sure they are secured and not cracked. Any suspicious looking
hoses should be replaced. When doing a Weber Conversion very often you have a
lot of Vacuum ports that need to be plugged when installing the Non-Smog carb.
Make very sure that you plug all unused vacuum ports on the manifold…Even a very
small port will cause a leak big enough to make the car not idle…
Basically just be very careful and
meticulous about the installation….After you get the vehicle running it is
always a good idea to check for leaks before trying to tune the carb.
You CANNOT TUNE a carb or F.I.
system that has a Vacuum leak….
Step-2: If you have a single carb you can skip this step...If you have multiple carbs then the 1st thing you need to do is make sure the carbs are Synchronized properly using a Correct Synch tool. This is CRITICAL to multiple carb performance...I don't care how good you think you are at synching a set of multiple carbs by ear (I'm very good and I'm not half as good as the tool is.) you are not close enough. The Synch tool will also alert you to other problems in the system like Bent throttle shafts, etc.... Linkage...This cannot be stressed too highly. Badly designed or Worn linkage is the #1 cause of problems with Multiple carb systems. More people have given up on Dual and Triple carb systems because of linkage than any other problems combined. If the carbs are not hooked together in a fashion that has no slop and allows minute adjustment between the carbs you are always going to have problems. Poor idle quality and "sticky high idle" problems are the most common symptom of this. A slight imbalance between the carbs at 1/3 throttle and up is not really noticeable to most people but a miniscule difference at idle will cause all sorts of problems. So in short...Get the carbs synched right FIRST. Repair or replace the linkage as needed to make them work together properly.
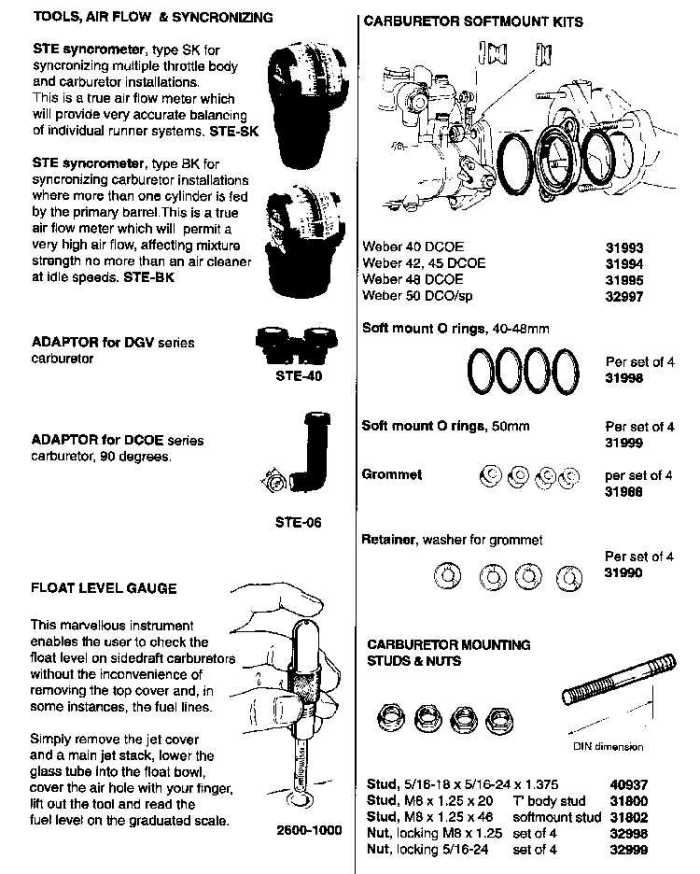


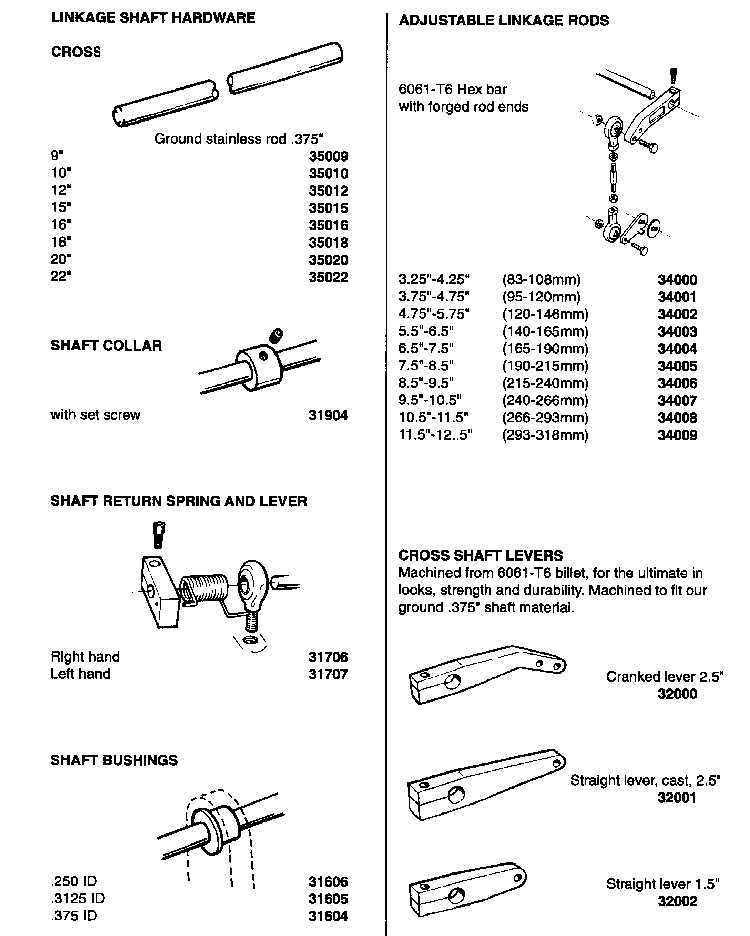

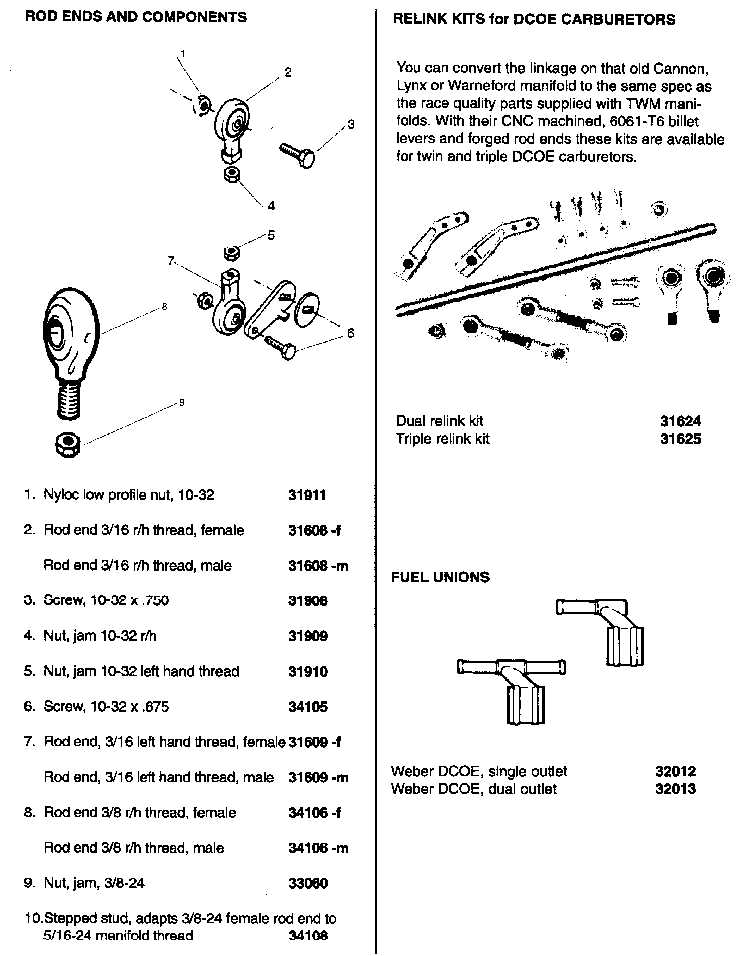
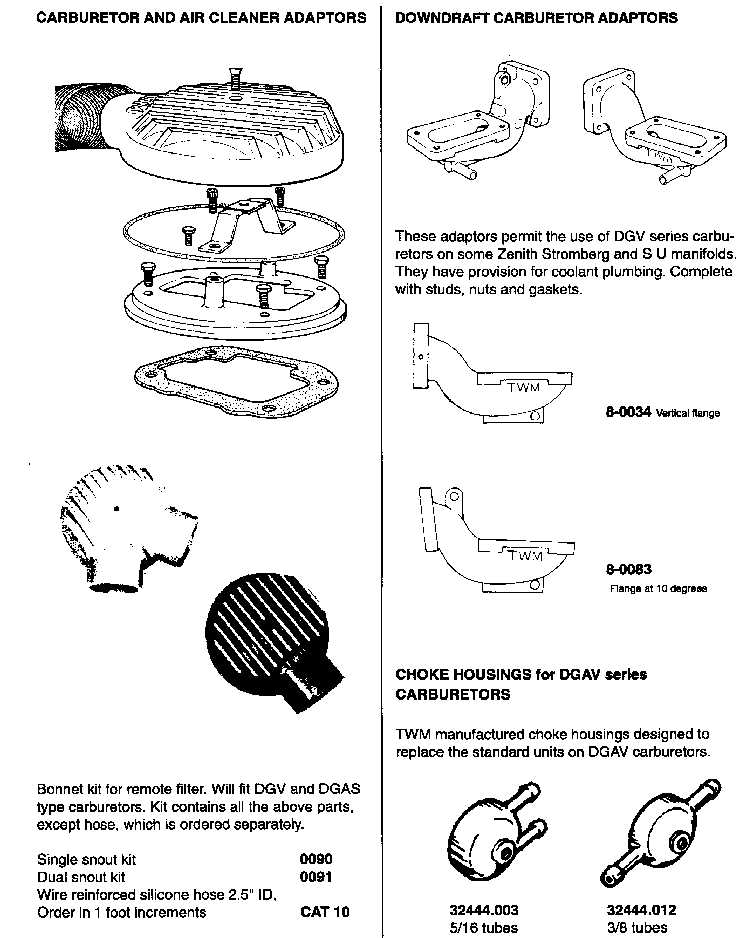
Step-3: Know what is in your carb NOW. Do not rely on a list on a website or a book that says what your carb might have come with. Actually remove the jets and chokes and check the sizes and WRITE THEM DOWN. Use this form to write it in so you know what you have. You cannot make jet decisions unless you kow what you are starting with...
Step-4: Make Sure your Ignition system is working properly. Remember...A Weber carb is always a performance upgrade and is designed to deliver more fuel and air and make more HP then the stock carb did. This means you need to have adequate spark to burn the extra fuel or you will have problems tuning and jetting your carbs. This is especially true of old British cars and cars that have point type ignition systems. A lack of spark or weak spark will make it impossible to tune the carbs properly or to their maximum potential. This is especially true of all multiple carb installations. You cannot hang multiple carbs on any engine without an increase in spark output and even hope to burn the extra fuel being delivered. A good electronic Ignition system to replace points and the addition of an MSD unit and good coil and wires are the best way to go. See our Ignition tech page below for more details.
Step-5: Make sure that your Fuel Delivery is right....Once again, you cannot tune carbs that do not have adequate or proper fuel delivery. See our Fuel pump Tech Page below for this information.
note: use by pass regulators only!! watch your PSI!! set it low!!
Do not ignore this step.
Step-6: Okay...Now that you have everything else sorted out ( Right ? You did do all that other boring stuff didn't you ? ) you can actually start tuning the carbs...The good news is that you probably made the car run good enough by doing those other steps that there is not a lot else to do..... If your car is still not running properly or you feel that you should have more power (Be realistic about that. A 4 cylinder 2.0 with a 32/36 is only going to make about 120-125 HP max so don't expect miracles.) then it is time to jet and tune the carb(s) You need to establish if you are running lean or rich. There is no way around this. There are a few easy ways to establish this and it is important to know otherwise you cannot get different jets to cure the problem. You can be running Rich at idle and Lean on the main circuit and Vice Versa...You need to do a plug check....Unless you have access to a 3 Gas or 4 Gas analyzer or Smog Machine to do your tuning then reading the plugs is the next best thing.. Another good option is to install a Air Fuel Ratio Gauge to help you with tuning. It is fast and accurate and will take a lot of the guesswork out of it. This is a particularly valuable tool for cars that get track use so that you make sure you do not lean out and put a hole in a piston...
You need to check your spark plugs to see if you running rich or lean. White plugs are lean and Black plugs are Rich. Ideally you want the ceramic part of the plug a nice Dark Tan to medium Brown color with a slightly darker ring right at the base of the threads of the plug. A new set of plugs may take a few minutes to get some color on it...
Idle Mixture
and Fuel Mixture:
There are alot of theories about setting idle mixture adjustment on a Weber carb
to determine Rich or Lean jetting....A Weber will run correctly with the mixture
screws from 1/2 turn to 3 turns out...The late style DCOE carbs with the extra
Air Bleed Screws on the top take 2.5 to 3 turns to operate correctly...So you
cannot say that because it is 1/2 turn out that you need smaller jets....You
need to find what is right for that particular engine...An engine with a strong
vacuum signal will draw more fuel in with less turns of the screw than an engine
with a weak vacuum signal will...This is the kind of thing that throws the
"certain number of turns" theory out the window..
The Mixture screw and idle circuit is CRITICAL to the overall drive ability of the car. It does not just control idle but the entire low speed running and part throttle transition. The mixture screw lets in an ALREADY MIXED volume of Fuel and Air to the engine. This is not an Air Screw. The more you open it the more mixed fuel and air enters the engine. Clockwise is Leaner and Counter-Clockwise is Richer.
The mixture screw is very easy to set whether it be a downdraft, side draft or multiple side drafts. Start with the screw or screws out 1.5 turns....Start the car and let it warm up. Set the Idle SPEED to approx 900-1000 RPM.. Make sure multiple carbs are synchronized...Turn the mixture screws in until the idle starts to stumble and get rough...On a side draft with 2 screws do them each a little at a time....Then back them out until the best idle quality is achieved. This is a very simple operation...The car should idle well and small adjustments leaner (Turning them in) should make the idle drop off. Opening the screws more should make it a bit richer but it should still idle. Assuming you have no vacuum leaks this is a very simple process. If you cannot get a good adjustment on these screws and you have to open the idle speed screws quite a bit to get the engine to idle there is a good chance you have a Vacuum Leak and you need to fix it.
Specific
Information on Mixture Screw Setting for:
32/36 DGV, DGEV Carbs. If you have to open the
mixture screw more than 2 turns on a 32/36 DGV or 38 DGES your idle jets are too
small...If you have to shut them below 1/2 turn they are too big....
38 DGES. If you have to open the mixture screw more than 2 turns on a 32/36 DGV or 38 DGES your idle jets are too small...If you have to shut them below 1/2 turn they are too big....Also the 38 DGES can be a little tricky because you are idling on both barrels at the same time. You have 2 mixture screws and they will not be set the same on most cars. This is because the plenum type manifold that they are on distributes fuel unevenly. By having 2 mixture screws you are delivering fuel from 2 places in the intake manifold. The Mixture screw closest to the engine will no doubt need to be in much farther than the outer mixture screw. This is Okay. I do not recommend Stagger jetting the idle circuit on a 38 DGES (In other words, do not use 2 different size idle jets even though you need to adjust the screws differently. This can cause part throttle drive ability issues.)
DCOE Series
and IDF / IDA.
On a DCOE or multiple DCOE's you should be between 3/4 turn and 1.5 turns out
for all older model DCOE's (DCOE 2, 9, 18, etc.) and 2 1/4 to 3 turns out for
late style DCOES (151 and 152 with air bleed screws under the white caps.)
Idle Jets and
tuning the idle circuit: Very Simply.. The bigger the
number the richer the jet. A 50 Idle jet is a .5mm fuel hole. On the DCOE and
IDA series carbs they have 2 numbers on them like 50F8. The 50 refers to the
.5mm fuel hole and the F8 Refers to the Air Bleed hole in the side.
A DGV, DFV, DGES mix the air internally in the carb and do not have these air
bleed holes in the idle jet. In a DCOE you are actually tuning the Air and Fuel
for the idle circuit with the idle jets. This is a little more tricky but not
too bad...Basically you can tune just about any car in the world with an F8 or
an F9 idle jet. ( YES there are exceptions to this and I am well aware of them
so don't send me nasty e-mails saying that your Mini only runs on F6 idles. This
is a basic tuning primer and there is no need to get into vehicle specific
problems.) The F8 is Leaner (Has a larger Air hole) than the F9...Soooooo. You
can have a 50F8 and a 50F9 and both have the same amount of fuel but the 50F9
has a richer MIXTURE (Less Air to the same volume of fuel.) Generally speaking
you should start with an F8 and play with the fuel size until you get close then
experiment with an F9 to see if that works any better...
IDF carbs are similar to the DGV and DFV series in that the air is mixed
internally. There is no F Number to deal with. The IDA carbs have no Air Bleed
Hole but do have an F number to identify this feature. It is an F10. The Air
Bleed for the IDA carb is in the Idle Jet holder and it is metered similar to
the DCOE. For those of you with multiple IDA or Rotary engines running a single
48 IDA you usually know what you are doing so I won't go into all the details on
this.,..
Idle jets are in .5 steps...50,55,60,65 etc. The bigger the Idle jet number the richer the jet. 1 step in idle jet size can make a HUGE difference. Do not go up or down more than 1 step at a time when tuning the idle circuit.
Choke Tubes
and the Main Circuit:
Okay...So now your car should idle correctly, the carbs
are synched, the timing is set, everything is good....Time to get the main
circuit right. Drive the car. It should come off of idle good and transition to
the main circuit smoothly...If it falls on its face and will not take any
throttle or runs better if you back off the then you could have a few different
problems depending the type of carb. Before you blame the carb make sure you
have the Fuel delivery right and the Spark Timing. If you do not have enough
advance you will have this problem and it will have nothing to do with the carb
tuning.
32/36 DGV,
DGEV, DFV and DFEV
These carbs have fixed venturis so the choke size is not an issue. The pump jets
are also not a problem. Do not mess with them. If you have a flat spot or
hesitation when you first take off then it is likely that the idle circuit is
too lean. If you know you have the idle circuit right then the primary main jet
is too small. Increase the main jet size 2 steps at a time. (150 main is a 1.5mm
hole...Main jets are in steps of 5. eg: 150, 155,160,etc.) Keep checking the
plugs after driving it for a few minutes (Do not let it idle when checking the
spark plug color for the main jets. Drive the car above 2000-3000 RPM for a few
minutes then shut the engine off before letting it idle then check the plugs. If
the car then transitions fine but hesitates or falls on it face when the
secondary is opened you need to work on the Secondary main jet....
A good option to playing around with your 32/36 Weber jetting is to just get A
Custom Performance Jetting Kits....We offer these for all Single 32/36 DGV and
DGEV applications operating from Sea Level to approx 4000 Ft...Above 4000 Ft you
start having more altitude problems and the vehicle needs to be tuned as
outlined here. Another good option is to install a Air Fuel Ratio Gauge to
help you with tuning. It is fast and accurate and will take alot of the
guesswork out of it. This is a particularly valuable tool for cars that get
track use so that you make sure you do not lean out and put a hole in a
piston...
38/38 DGES
These carbs have fixed venturis so the choke size is not an issue. The pump jets
are also not a problem. Do not mess with them. If you have a flat spot or
hesitation when you firts take off then it is likely that the idle circuit is
too lean. If you know you have the idle circuit right then the main jet is too
small....Increase the main jet size 2 steps at a time. (150 main is a 1.5mm
hole...Main jets are in steps of 5. eg: 150, 155,160,etc.) Keep checking the
plugs after driving it for a few minutes (Do not let it idle when checking the
spark plug color for the main jets. Another good option is to install a
Air Fuel Ratio Gauge to help you with tuning. It is fast and accurate and will
take alot of the guesswork out of it. This is a particularly valuable tool for
cars that get track use so that you make sure you do not lean out and put a hole
in a piston...
DCOE, IDF or
IDA
Here we go....This is the real tricky part. I feel that
Sidedraft DCOE , IDF and IDA carbs are easy to tune but you have to have a real
feel for Rich and Lean and understand how the carb works. To get a good
understanding of this I cannot recommend too highly to get the Weber Factory
Tuning manual and really understand what each component does. That said this is
the real Cliff Notes version of tuning the power circuit of these carbs.
Choke Tube or Main Venturi size is the basis for everything in tuning DCOE, IDA and IDF carbs. If you get the Venturis wrong you will never get it running right. Too big and you will always have a flat spot that you cannot tune...Too small and it will always run rich and not make any power. If you have poor throttle response at low RPM
This is a guideline only to get you started or to make sure you are not totally out of range making it very difficult to tune. There are many of you running cars successfully with choke sizes outside this range so don't e-mail me about it. The difficulty in tuning these types of cars is that there are many combinations that work well depending on the engine and the state of tune. That is why everything is tunable. You can tailor the carbs to suit your needs, driving style, engine, location, weather and altitude conditions, etc.....
Here is a very basic chart of what venturi sizes you need to popular vehicles and engine sizes for STREET USE...All out race engines are a totally different story. Use the engine size and HP rating to estimate what you need for your car or engine if it is not listed.
This is a guideline only to get you started or to make sure you are not totally out of range making it very difficult to tune. There are many of you running cars successfully with choke sizes outside this range so don't e-mail me about it. The difficulty in tuning these types of cars is that there are many combinations that work well depending on the engine and the state of tune. That is why everything is tunable. You can tailor the carbs to suit your needs, driving style, engine, location, weather and altitude conditions, etc.....
|
Engine /
Car
|
Approximate HP
|
Carb or
Carbs
|
Starting
Choke Tube Size
|
| Datsun Z 2.8 - 3.0 | 250-280 | Triple 45 DCOE | 36mm |
| Datsun Z 2.4 - 2.8 | 200-250 | Triple 40 DCOE | 34mm |
| BMW 2002 | 130-140 | Dual 40 DCOE | 34mm |
| BMW 2002 | 150-160 | Dual 45 DCOE | 36mm |
| BMW 2002 | 130-140 | Single 45 DCOE | 36mm |
| BMW 2002 | 120-130 | Single 40 DCOE | 32mm |
| Toyota 22R | 140-150 | Dual 45 DCOE | 34mm |
| Toyota 4AGE | 130-140 | Dual 40 DCOE | 34mm |
| Porsche 914 2.0 | 120-130 | Dual 40 IDF | 32mm |
| Porsche 914 1.8 | 110-115 | Dual 40 IDF | 30mm |
| Mazda RX7 | Stock Engine | Single 48 IDA | 42mm |
| Mazda RX7 | Street or Bridge Port | Single 48 IDA | 44mm |
Do not try to
choke down a DCOE carb that is too large to try and cure a problem...you will
just create more problems....A 45 DCOE should NEVER need less than a 34mm choke
to run properly. If it does then the carbs are too large or you have another
problem...A 40 DCOE can use as small as a 28mm choke tube but chances are the
performance will not be good with anything smaller than a 30mm choke....I have
found that a correctly sized 40 DCOE application should always stat with a 30mm
choke and do up to a 34mm max....Bigger or smaller than that and you probably
have either the wrong size carbs or another problem that is causing you to tune
outside of this range...This same info applies to IDF carbs as well...
Main Jets:
Air Corrector
Jets
Emulsion Tubes:
Pump Jets and Pump Bleed Backs:
Pump Rods:
Fuel Pumps and Fuel Pressure:
Fuel delivery is critical to the proper performance of
any Weber carb. From a basic 32/36 DGEV to a set of Triple Side draft DCOE's.
Webers rely on a stable full float bowl in order to mix the fuel and air
correctly. Mechanical pumps very rarely do this. They pulse fuel instead of
giving a smooth even delivery and the amount of fuel varies with engine RPM.
A Proper Electric Fuel pump will give the best performance and most stable tuning for any Weber carb application. We use only High Volume and Low Pressure pumps. Webers work best at approx 4 psi of fuel pressure (Not 2 psi like many of the older books stated.) and you need Volume not Pressure to keep the float bowl full.
We ONLY use the Carter Rotary pumps. They are High Volume (60-70 GPH) but only 4 psi. This is PERFECT for all Weber applications from a Single 32/36 DGV on a Truck, Jeep or Car to a Triple Side draft setup on a Road Race car making 300 HP...This pump DOES NOT and SHOULD NOT use a Pressure Regulator for any reason. That is why we use it....
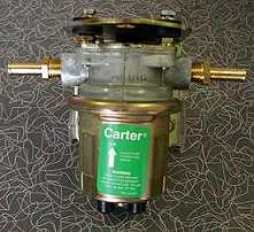
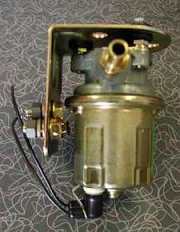
Carter 4070 Fuel pump with Mounting Bracket kit $95.00
Problem Pump and Regulator setups:
These are combinations that many of you are using and you
could be experiencing problems because of it.
Holly Fuel Pumps with Regulator:
This is a very common
combination and it has a lot of problems. The pump puts out too much pressure so
you have to buy a regulator for it. The Regulator is just a restrictor that
inhibits flow. This causes a huge loss of Volume and
overloads the pump causing a lot of noise and premature failure.
This results in the float bowl going low or empty under hard
acceleration and causes cornering problems.
Use the HOLLY
bypass regulator!!
Facet Fuel Pump:
This is one of those little square pumps with the transistor
mounted on top that make a ticking noise all the time. These pumps are TERRIBLE.
No volume and High Pressure. These pumps have been sold for many years with
Weber and Mikuni conversions and have cause many people alot of tuning problems.
They are a pulse type pump that delivers almost no volume
(usually less than the stock mechanical pump did) and usually at High Pressure.
This cause flooding at idle and lean out conditions under high load.
Do not use them....
Ignition Systems, Spark Output and Spark Advance:
This is a serious topic that seems to get ignored even by
professional installers. The essence of a Weber conversion is that you are
putting on a Larger carb that flows more fuel and Air to make more HP.
Most older cars that are getting these carbs installed on them had very bad Point and Condenser Ignition systems with very low spark output. These systems were barely adequate for a stock carb let alone a performance upgrade. Adding even a single 32/36 carb to an old BMW, Opel, Etc will overload the stock ignitions systems capabilities.
When you add Dual or Triple carbs you are really causing a problem. You are adding a bunch of extra Fuel and Air but not adding the extra fire needed to burn it properly. This results in jetting problems, rich running conditions, etc. If you are doing a conversion from a later model Fuel Injected car that had a decent Electronic Ignition system on it this will not be as much of a problem although you could have a problem with Spark Advance on these types of vehicles (Read below.)
When doing a Weber conversion on an older Point type Ignition car it is a MUST to at least do an upgrade to Electronic Ignition with a higher output Coil and good wires and plugs. This will allow you to jet and tune the carb to its maximum HP and Fuel Economy potential.
We use the
Pertronix Ignition conversion on most vehicles ($89.00- $129.00) with the Bosch
Red Coil ($45.00) and good plug wires and NGK Spark plugs. On dual and triple
carb conversion we highly recommend the use of the MSD Spark Amplifiers with the
Electronic Ignition. We offer these individually or in system packages like the
Ultimate Spark Package we do for the BMW 2002. This will insure you have enough
spark to burn all that extra fuel you are throwing at it. The difference in HP,
Idle Quality, Cold Starts, and Fuel Economy are all very noticeable when doing
the Ignition upgrades.
Spark
advance is
the other problem you are faced with. Most factory carb equipped cars have
vacuum advance distributors. This is fine when installing a 32/36 or 38/38
because they have vacuum advance ports in to the carb but when installing side
drafts you do not have this option.
DO NOT hookup the distributor vacuum advance to the intake Manifold. That does
not work and is a common mistake we see. If you do that you will pull full
advance at idle then as soon as you open the throttle it loose vacuum and the
timing will retard quickly causing a big stumble or flat spot and very bad
throttle response.
When running Side drafts you need to either get a centrifugal
advance distributor or leave your vacuum advance disconnected and just run more
initial timing. You usually need 12-14 degrees advance at 1000 RPM and 36
degrees total by 3000 RPM for the carbs to react properly. These timing numbers
are baseline estimates only and can vary from car to car. You have to make sure
you do not have a detonation problem from too much advance.
CLICK HERE FOR THE PDF PARTS BLOWUP ON 45 DCOE
Weber
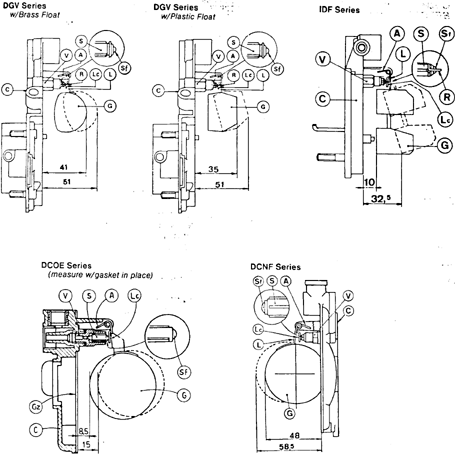
Carb Float Level Settings.
THIS ITEM IS A MUST FOR WEBER TUNING!!
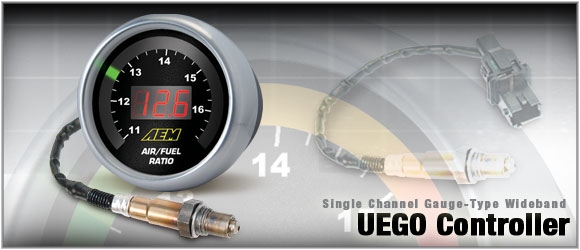
| Gauge-Type Wideband UEGO Controller | RETAIL$339 |
|
||||||||||||||||||||
|
|
||||||||||||||||||||||













![[Most Recent Quotes from www.kitco.com]](http://kitconet.com/images/quotes_7a.gif)